This is our first in depth how-to; be sure to leave any suggestions or questions so we can improve!
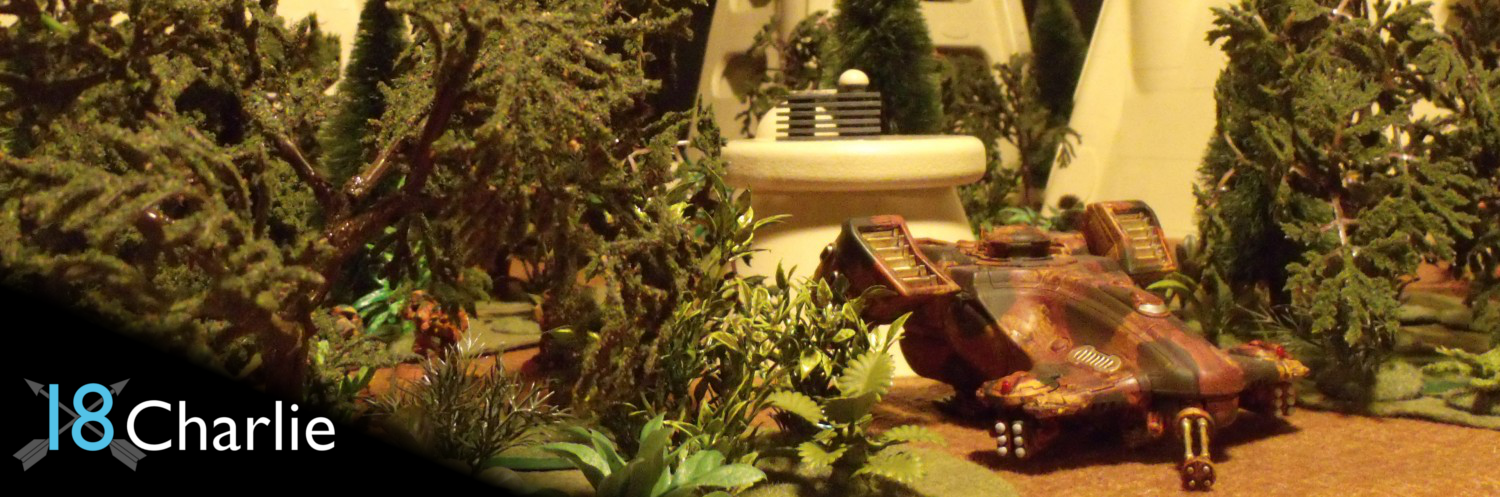
This tutorial will show you how to create some intimidating crystals, and teach you how to make molds and cast from them. We chose a traditional looking green crystal, but you can choose whatever shape or color suits you.

Step 1: Find objects to cast
This part is pretty important. You can get pretty much any shape you want, but if you aren’t familiar with making mold and casts, try to keep it simple. We’ve opted for a fairly traditional crystal shape. We’ll call it the ‘pencil’ shape, because that’s what we recommend you use to make it!

Our crystals were made by grouping three sizes of the same basic shape in different ways to make a singe mold.
You can use something you found, bought, or made yourself, as long as you get the shape you want. Ours were made out of wood pieces we did ourselves and some normal pencils. You could use expanding foam, plaster, etc to get the shape you want. If the material you chose is porous, use a sealer (like PVA glue or wood deck sealer) to plug up the holes.
If you don’t want to make your own though, just use pencils of different sizes. If you want big crystals, look for the jumbo pencils kids use during kindergarten. To get the pencil tips to the right angle, we cut and sanded them. Try to keep the edges as smooth as possible to keep the molding and casting process simple.

How big do they make these things anyway?
Step 2: Get ready for the mold

These have lasted us for years.
First you will need a container to hold the mold making material. You can use taped-together cardboard (the stiff kind) or even drink mix tubes. This needs to be bigger than the piece you are going to end up making. We like to keep mold walls anywhere from 1/4″ to 1/2″ thick. This makes the mold strong enough to survive the casting process while being flexible enough to actually get the casts out multiple times. If you are using something without a floor (like the boxes above), you should seal the bottom edges of it with modelling clay or something similar so the liquid won’t leak out. You’ll have to coat this in a mold release to make sure the mold doesn’t tick to the container. These come in sprays, liquids, and gels, but the most common is petroleum jelly. It tends to go on thick though, so try spreading it on thinly with a brush.
We use the little cups in these things for all sorts of stuff too.
You can make molds in a lot of different materials. You have silicone, wax, vinyl, and all sorts of others. Some are easier to use than others, and the type you should use depends on what you want to do. Silicone is expensive, reacts badly with sulfur (so watch what clay you use!) and is used mostly for white metal. Vinyl is cheaper, but doesn’t handle high temperatures well. That makes it a good choice for resin and plaster casts. They even have powders you can use, like the kind you use for life casts of your baby’s hands and feet, though these tend to shrink as they dry.
Whatever you choose, be sure to read the direction carefully! Take special note of the pot life of the material. That lets you know how long you have to work with it before it sets once you start mixing. Some only give you a few minutes, so have everything ready to go!
Step 3: Make the mold
One trick to making these molds is to thinly coat the object in your chosen material with a brush. We do this to greatly reduce the number of air bubbles that get trapped on the surface. You usually have to do this fast, so don’t worry if it isn’t too neat. Once the surface is coated you can pour the rest of the mixture into the cavity.
The rest of it depends on what material and brand you chose, so we’ll leave it at that.

Now we’re ready to churn out crystals!
Step 4: Cast it
Now that we have our molds, we can make the actual crystals. We used a translucent resin to do this, but if you feel up to it you can use a clear one. These tend to be a bit more expensive/complicated to mix, so we picked the easier route. Since resin can be expensive, you can use small clear plastic beads, crushed glass, or anything like that to cut down on costs. If you fill the mold halfway with resin, then sprinkle your filler in, you can get a lot more bang for your buck. Depending on what you choose, it can also give your crystals a more interesting internal structure to look at. Now you just have to wait…

…and repeat however many times you want.
Once they hardened, we cut them to different heights and angles to add some easy variety. You can also glue pieces together to get even larger terrain pieces.
Step 5: Touch-ups
You crystals come out white/clear, so go over them with a thin wash if you want to change the color. We also chose to give them a coat of “Future” floor polish, which gave them a shiny surface. Now all you have to do is base them and enjoy your new terrain!


Pingback: The Crystal Fields | 18charlie·
Walter White would be proud.
OK you win, I have no idea what the Walter White reference is.
Breaking Bad TV series. WW makes crystal meth. large crystals indicate purity,
Pingback: The Petal Forests | 18charlie·
Very cool. I like the idea of putting broken glass in to give them some internal structure.
You can actually use almost anything that is clear or semi clear to add some internal texture. We used small plastic pellets to add the texture into these crystals.
Just in case you’re not sold on the idea of really large crystals since you think that they aren’t very realistic. Here are a few pictures of some real crystals that are comparable in size.to the ones that we made. These pictures were taken inside a cave in Mexico.
Thank you for this tutorial. I intend to have a crystal cave for my Dungeon Crawl project and this is eactly what I had in mind.
You are most welcome! Always glad to help out a fellow gamer with a few ideas.